Learn how to create interactive web forms to collect user data efficiently
Table of Contents
Introduction to HTML Forms
HTML forms are essential tools for collecting user input on websites. They enable functionalities like login pages, contact forms, surveys, and checkout processes. In this tutorial, you’ll learn how to build, customize, and validate forms using HTML.
1. Basic Structure of an HTML Form
All forms start with the <form> tag, which defines the boundaries of the form and how data is sent to a server.
Key Attributes:
action: Specifies the URL where the form data is sent.method: Defines how data is sent (GET or POST).
Example:
<form action="/submit-form" method="POST">
  <!-- Form elements go here -->
</form>
2. Common Form Elements
Text Input
Collect single-line text (e.g., names, emails):
<label for="username">Username:</label>
<input type="text" id="username" name="username" placeholder="Enter your name">
Password Input
Mask user input for security:
<label for="pwd">Password:</label>
<input type="password" id="pwd" name="password">
Email Input
Enforces email format validation:
<label for="email">Email:</label>
<input type="email" id="email" name="email" required>
Radio Buttons
Let users select one option from multiple choices:
<input type="radio" id="male" name="gender" value="male">
<label for="male">Male</label>

<input type="radio" id="female" name="gender" value="female">
<label for="female">Female</label>
Checkboxes
Allow multiple selections:
<input type="checkbox" id="subscribe" name="subscribe" value="yes">
<label for="subscribe">Subscribe to newsletter</label>
Dropdown Menus
Use <select> and <option> Tags:
<label for="country">Country:</label>
<select id="country" name="country">
  <option value="usa">USA</option>
  <option value="canada">Canada</option>
</select>
Textarea
Capture multi-line text (e.g., comments):
<label for="message">Message:</label>
<textarea id="message" name="message" rows="4"></textarea>
3. Form Accessibility & Best Practices
- Labels: Always use
<label>with theforattribute to link text to inputs. This improves screen reader accessibility. - Fieldset & Legend: Group related elements for better structure:
<fieldset>
  <legend>Shipping Address</legend>
  <!-- Inputs go here -->
</fieldset>
4. HTML5 Form Validation
Use built-in attributes to validate data without JavaScript:
required: Ensures the field isn’t empty.min/max: Restrict number ranges.pattern: Validate using regex (e.g., phone numbers).
Example:
<input type="tel" id="phone" name="phone" pattern="[0-9]{10}" required>5. Submit & Reset Buttons
- Submit Button: Sends form data to the server.
- Reset Button: Clears all inputs.
<input type="submit" value="Submit">
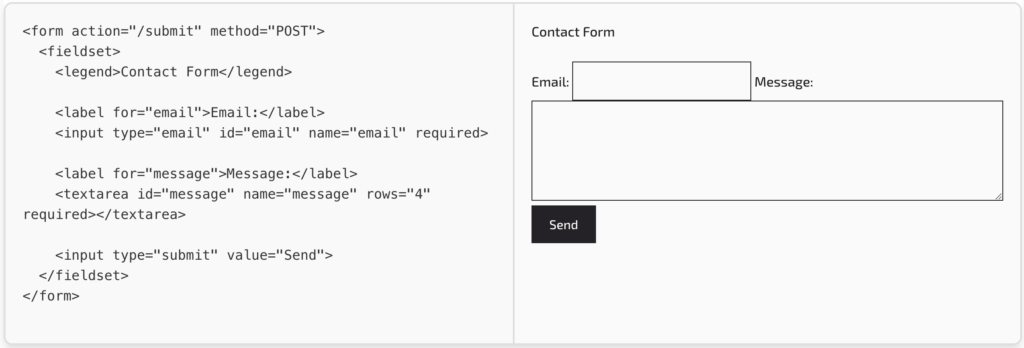
<input type="reset" value="Clear Form">6. Complete Form Example
<form action="/submit" method="POST">
  <fieldset>
    <legend>Contact Form</legend>

    <label for="email">Email:</label>
    <input type="email" id="email" name="email" required>

    <label for="message">Message:</label>
    <textarea id="message" name="message" rows="4" required></textarea>

    <input type="submit" value="Send">
  </fieldset>
</form>
Output Result
7. Best Practices for Form Design
- Keep it Simple: Only ask for necessary information.
- Use Semantic HTML: Improves accessibility and SEO.
- Validate on the Server-Side: HTML5 validation isn’t foolproof.
- Secure Forms: Always use HTTPS to protect user data.
FAQ – HTML Forms
Q: How do I style forms with CSS?
A: Target elements like input, textarea, and use classes for custom styling
Q: Can forms work without a server?
A: No—you’ll need a backend (e.g., PHP, Node.js) to process data.
Q: What’s the difference between GET and POST?
A: GET sends data via URL (visible), while POST sends it securely in the request body.
Next Steps: Practice building a registration form with fields for name, email, password, and a submit button. Experiment with validation and dropdown menus!